It is currently April 28th, 2024, 12:18 pm

21 Scarab SOB Overhaul - Pic Heavy

View active topics

All times are UTC - 5 hours [ DST ]


Post new topic Reply to topic  [ 47 posts ]  Go to page Previous  1, 2, 3, 4, 5
Author Message
 PostPosted: April 6th, 2015, 7:24 am   
Team Member
User avatar

Joined: April 2nd, 2012, 7:35 pm
Posts: 406
Location: Barrie, On
the dirty work looks almost complete ......looking good so far ;)

_________________
Triad V21 - 300xs
19' J-craft - 175 opti
18' Pontoon - 115 opti
12' tinny - 9.9 merc


Top
 Profile Send private message  
 PostPosted: April 13th, 2015, 7:42 pm   
Member

Joined: April 26th, 2013, 10:33 pm
Posts: 120
Location: Calgary, Alberta
Thanks Doug, it has been keeping me out of trouble :mrgreen:

So I spent a lot of February and March grinding.....Didn't take a lot of pics of that, familiar story - 36 (or 24) grit and have at it...
This boat is a little different than others. Those grooves are the strakes. The stingers sit in then, as opposed to having foam or putty-filled strakes. I suspect it made dropping the stringer grid in place much quicker. Oh yeah, you know the age-old debate amongst boatbuilders about what to bed stringers in (i.e. putty/Corebond vs. chopped-strand mat, vs. epoxy vs. Plexus ya da ya da) ? Well Wellcraft didn't buy into that - let's not bed them at all ! That's right - they were not attached to the hull other than the tabbing. Came out real easy :shock:

Image

I'm taking it back to solid woven roving. The narrow belt sander is very handy for making nice radii in inside corners.

Image

Also cut out the other side of the cockpit floor pan.

Image

_________________
Current Boats:
1986 21' Wellcraft Scarab I - OMC V8 Resto-Mod Project
1987 21’ Checkmate Starflite - to be 250HO ETEC


Top
 Profile Send private message  
 PostPosted: April 13th, 2015, 8:06 pm   
Member

Joined: April 26th, 2013, 10:33 pm
Posts: 120
Location: Calgary, Alberta
So finally getting to some fun stuff. Bought some marine-grade 3/4" fir plywood and had it ripped to width at the yard on their big panel saw. I want full-length stringers to the main bulkhead at the forward end of the cockpit. That amounts to about 11 feet, so obviously 8' plywood will not cut it. You can special-order longer lengths but not worth the money, I'll just scarf the plywood to length. I've done lots of this before.

I'm doing an 8:1 ratio scarf, more than adequate for an epoxy joint. There's lots of ways to cut these but I just use a sharp hand plane. If you have a power plane with carbide knives that's actually the best way. I have overlapped the 2 pieces end-to-end and screwed them to a back-up board so there's a stiff "stack" to work away at. I "wasted" a lot of the material with a chop saw first.

Image

80% done the scarf. You end up using the plies like "contour lines" to ensure you cut a nice even slope.

Image


And here it is being installed. The stringer is bedded in WEST 610 epoxy (great stuff, comes in a caulking tube). I used regular WEST (thickened with cabosil) to glue the scarf.

Image

The "shelf" above the strakes is somewhat wider than the 3/4" stringer. This results in sharp inside and outside corners that you'd have to wrap glass over. As a result, the factory layup had a really bad air pocket all along the inside corner of the stringer tabbing (not unexpected with heavy roving). It helped distribute water along the stringer - a no cost option :? (as you can tell the build quality on this boat was VERY production - if you ever thought Scarabs were superior give your head a shake). Anyway, I'm doing fillets with epoxy to solve this problem. I trimmed a plastic squeegee to nice radii and trowelled it in. You can sort of see the scarf - my black pen line I used to align the "knife edge" of the forward piece. The top of the stringer was rounded over to a 1/4" radius prior to installing (also not done by the factory). Next I'll start tabbing them in with 1800 45/45 double-bias ("biaxial") in epoxy.

Image

_________________
Current Boats:
1986 21' Wellcraft Scarab I - OMC V8 Resto-Mod Project
1987 21’ Checkmate Starflite - to be 250HO ETEC


Top
 Profile Send private message  
 PostPosted: April 13th, 2015, 10:10 pm   
Team Member
User avatar

Joined: April 2nd, 2012, 10:55 am
Posts: 327
Wow that's lots of work to do but the quality shows. Looking good.

_________________
18 Talon w/ 225 Promax - Sold
15 Ally - Sold
18' Charger STV - Merc 280


Top
 Profile Send private message  
 PostPosted: April 13th, 2015, 10:34 pm   
HPBC PRESIDENT
User avatar

Joined: March 31st, 2012, 5:53 pm
Posts: 3548
Location: Lapping lil charger
Awesome!!! You'll need a lexan floor so you can show your work lol.

_________________
08 SRV w/3.1 Hydro-tec Phase lll

I've got enough torque to tear a hole....in time...


Top
 Profile Send private message  
 PostPosted: April 14th, 2015, 5:42 pm   
Member

Joined: April 26th, 2013, 10:33 pm
Posts: 120
Location: Calgary, Alberta
Thanks guys, there's still tonnes of work to go but it starts to feel good when the new stuff goes back together how you want it. More pics to follow as the glass work progresses.

Matt

_________________
Current Boats:
1986 21' Wellcraft Scarab I - OMC V8 Resto-Mod Project
1987 21’ Checkmate Starflite - to be 250HO ETEC


Top
 Profile Send private message  
 PostPosted: June 24th, 2015, 10:46 pm   
Member

Joined: April 26th, 2013, 10:33 pm
Posts: 120
Location: Calgary, Alberta
Well I haven't had much time to work on it due to house projects, but here's some updates. I decided to do the repairs on the splashwell before putting the second stringer in. I have a lot better access to the underside of the well with it out. The glass work on the splashwell wasn't very good. It was cracked on both sides near the bottom, and there was a crack in the exterior portion of the well where it meets the motorboard.

I ground away the bad glass and laminated in 4 layers of 1800 biaxial.
Image

I then built a cross-member out of 2 layers of 3/4" marine fir plywood epoxied together. This then was bonded into the under side of the splashwell, running from one knee to the other. This adds a lot of strength to the transom. There's a notch in the cross-member to later accept another knee down the center of the transom.

Image

Image

The crossmember will then get glassed over as well.

The splashwell had 4 holes that needed patching. The forward side of the well is plywood-cored. One of these holes I hole-sawed out as a gelcoat sample to send to Fiberlay to get some computer-matched gelcoat. The other was an old rigging hole for the old Hynautic steering. Two old rigging holes on the starboard side were glassed up first from the inside, then I'll do the same on the outside.

Image

Image

I hole-sawed new plywood plugs, and epoxied them in place, using little blocks of wood hot-glued in place to hold them. Worked great. They will now be glassed up from both inside and out.

Image

Image

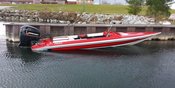
Obviously this thing won't be in the water this season. No problem, I'm more concerned with getting it rebuilt right.

_________________
Current Boats:
1986 21' Wellcraft Scarab I - OMC V8 Resto-Mod Project
1987 21’ Checkmate Starflite - to be 250HO ETEC


Top
 Profile Send private message  
Display posts from previous:  Sort by  
Post new topic Reply to topic  [ 47 posts ]  Go to page Previous  1, 2, 3, 4, 5

All times are UTC - 5 hours [ DST ]


Who is online

Users browsing this forum: No registered users and 9 guests


You cannot post new topics in this forum
You cannot reply to topics in this forum
You cannot edit your posts in this forum
You cannot delete your posts in this forum
You cannot post attachments in this forum

Search for:
Jump to:  


Powered by phpBB © 2000, 2002, 2005, 2007 phpBB Group
Style originally created by Volize © 2003 • Redesigned SkyLine by MartectX © 2008 - 2010